So a few weeks ago I discovered Jamberry nails through a friends Facebook party. I’ve always loved nail decoration, even when I could care less about makeup, but am continually frustrated by the fact that I can barely get pol
ish to last 24 hours. I have finally found a solution! I love these things so much that I’ve now become an independent consultant with the company, so maybe I can make a few bucks off the fact that I’m going to tell everybody I encounter about how awesome these things are.
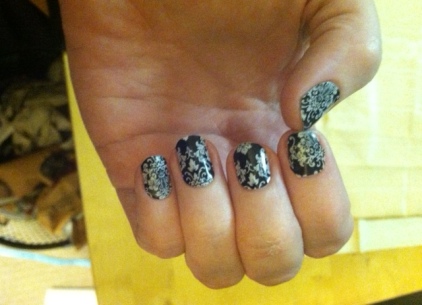
My first application of Jamberries in Black and white damask
What are Jamberry Nail Wraps?
They are a product unlike any other that I am aware of. At first, I was all “Oh, they’re like those Sally Hanson things.” Nope. Those are essentially nail polish in strip form. These are vinyl decals for your nails. Yup, very thin vinyl that forms a watertight bond to your nail that last up to 14 days on your nails (or 5 weeks on your toes!) They are totally non-toxic and don’t harm your nails.
How do they work?
The Jams come in a sheet of 18 strips, each strip can do at least two nails. The sizes are varied for everything from pinky to big toe and you can cut them to fit if necessary. They have adhesive that bonds to the nail via heat and pressure.
How do you apply them? Is it difficult?
Ok, I’m not going to lie. Application is neither quick nor particularly easy. The first time may be fairly frustrating, especially if you only go by the brief instructions on the package. But I find I enjoy wearing them so much and they work so well it’s totally worth spending a little time while watching TV applying them. There are a lot of different methods and tips for application, and I recommend searching around and watching some YouTube videos. But here are the important things I think you need to know.
1. You need to push your cuticles back and not apply the jams to any part of the cuticle or skin. This is the main mistake I made when I first applied, and I had to replace 3 nails entirely the next day when they came off. The jams don’t bond to skin or cuticle, so if you overlap them with your skin, they will lift up, water and oil will get underneath, and the adhesive will loosen. It’s better to have a sliver of bare nail showing than to place them over the cuticle. This is the most challenging part of placing them, and I’m still getting the hang of it.
2. Clean each nail with alcohol or nail polish remover RIGHT before you apply the jam. Any oil from your skin will make the adhesive not work as well, so prep each nail individually right before you place the jam.
3. Heat the jam for as long as you want. The instructions I originally read said 3-6 seconds, but I would do more like 20 seconds, depending on your heat source. At first I was afraid of warping or melting the jam, but they’re vinyl and that’s not going to happen. Heat away. You can use a hair dryer or the Jamberry mini heater (I’m looking forward to trying this as I’ll get one soon) OR you can use a household iron if you don’t want to fill your house with hot air. Just be careful with the iron because I totally burned myself doing that.
4. Cut the jam with scissors or nail clippers as close as possible to your nail. This is a bit awkward on your dominant hand, but I’ve gotten a lot better at it with 2 applications. WAIT TO FILE your nail until it has cooled. If you file it right away, you can lift the jam. Also file ONLY in a downward direction.
5. Once all of your jams are applied (or ok, as you do each one, but I think it’s easier to do it at the end) seal the edges of your nails by applying direct heat. I learned this from YouTube, and there are a few ways to do it, but the way I like is to heat up something metal (tweezers or a small screwdriver) on your iron and then touch that to the ends of your nails, pressing down. Just touch the tweezers or whatever to your iron for a few seconds and then hold it against the edge of the nail/jam. This ensures the jam is sealed against your nail. You can also use this to smooth the edges if they are ripply and it worked around the cuticle as well, just be careful not to burn yourself. Normally the tweezers aren’t hot enough for that, but caution. I’ve also used this method to reseal my nails if they start lifting around the edges after several days. At a certain point (it was 9 days for me) the adhesive won’t stick that well, especially if water or oil gets under the edge, but it will give you a little longer.
Do they really last?
YES. I wore my first set for 9 days before I removed them. Only a couple of the jams were coming up at that point, and I could have replaced just those because the rest were really well stuck on. And I am HARD on my nails. I’m a seamstress and use my hands constantly, plus I’ve been hand-sewing, painting with my fingers, and I’m always typing AND wash my hands a lot. My nails normally break, chip, and peel like crazy, but the Jamberries actually protect my nails and they haven’t broken at all since I started wearing them. They make my nails SO MUCH stronger.
Obviously how long they last will vary depending on your nails, the application, and what you do with them. The more you use your nails as tools, the more likely the ends will be to lift up. But I think I’m pretty damn hard on my nails and I’m thrilled with how they last.
Do they feel weird on?
At first they feel a little different from bare nails. I also think they take a little while to really set because they feel slightly delicate at first. So I try not to wash my hands immediately after applying and to avoid scratching with my nails for a few hours. But then they either seem to really harden or I just get used to them because they feel totally natural. Or actually BETTER than natural. My nails naturally SUCK. These things feel much better because I’m not constantly in danger of bending my nail back or having it splinter. I really like how they feel. So, yes, I’m totally addicted at this point.

My second wraps.
How do you remove them?
Basically you have to lift the edges up (or wait till they lift on their own) and then soak them in either warm water, nail polish remover, or oil. I used oil because it’s supposed to be the best way. Mine were really stuck well still and it took some work to get them off even with the oil. But it only took a few minutes and there was no damage to my nails at all.
Aren’t they a little expensive?
Each sheet of Jamberries costs $15. That is always the price, unless you get them free for hosting a party. Each sheet will get you AT THE VERY LEAST 2 full applications of your fingernails, and probably also 1-2 applications for your toenails. You can get more if you are willing to cut the larger ones down to fit your nails, or get creative in cutting to get more than two nails out of a strip. So let’s say it’s 3 manicures for $15. That’s a LOT cheaper than salon prices. It’s more expensive than nail polish, but not by all that much, considering high quality polish can cost $10/bottle and how many times do you ACTUALLY use each color? Plus they last SO MUCH LONGER than polish.
I originally almost didn’t buy any because I do live on a budget and thought this was a frivolous thing to spend money on. but I splurged with the rationale that they would be great for when I cosplay at conventions and my polish is always chipped by Saturday. Now these make me so happy to wear on a daily basis, that I consider it an allowable luxury. I love looking down and seeing that my nails look awesome, plus how much better my nails feel being protected.
What’s with the parties?
Jamberry Nails parties function just like any typical direct sales party. (Tupperware, Pampered Chef, Avon) Parties can be either real life in person parties or Facebook parties. There is always a party host, who invites the people who are attending. The host receives free gifts/credit depending on the amount of sales at a party. Facebook parties are super simple and just involve inviting your friends to a FB event that will last a certain amount of time and any sales during that period are added up to go towards hosting gifts. Everyone orders directly from the website and their products are mailed directly to them. If anyone wants to host any FB parties or even in-person parties, let me know. I promise to be as non-obnoxious as possible while still trying to sell things.

So if you want to try them, you can purchase any of the hundreds of styles at my personal Jamberry website.
If you have any other questions, I’ll be happy to answer them.

hi! so I read many excited reviews about Jamberry and decided to give it a go. They were much harder than most people make them out to be, and there are several bubbles in mine so I have the feeling they won’t last as long. Am I doing something wrong?Maybe that has something to do with the fact that I am only 14 years old 😉 still,despite the imperfections I am hoping to try them again. Does it get easier the more you do it? I hope so!
-Alicia Grace Mason